
Christmas Tree Wall Hanging Tutorial
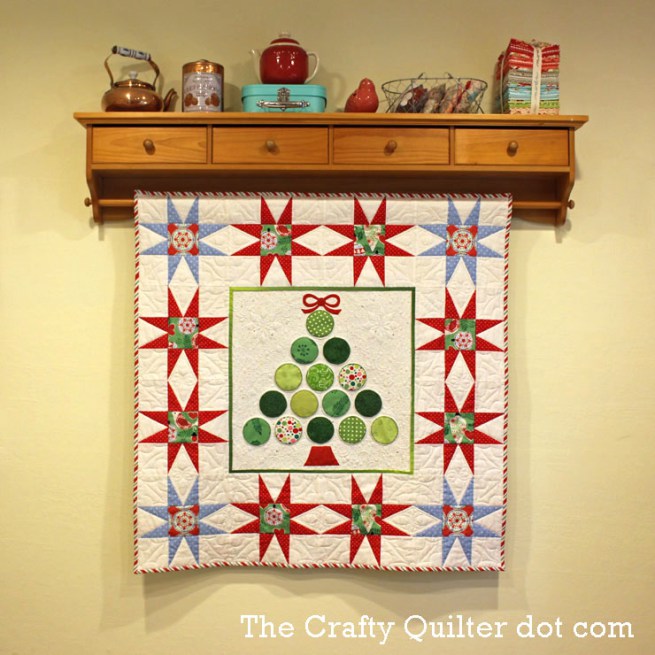
A Christmas Tree Wall Hanging. Some things are worth waiting for!
This is a plan and I am so happy with how it turned out! (Plan A was a Christmas stocking, but I just wasn’t feeling it.) This is the perfect size to use as a wall hanging, but it could go on a table, too.
Many of the fabrics I used came from Maywood Studio’s collection, All Wrapped Up, as well as a good dose of my own stash thrown in. I especially love the striped binding that I cut on the bias.
Here’s the tutorial so you can make your own. (If you want to print this out or save it for later, you can use the pdf and print buttons at the top of this post.)
Quilt size: 36 1/2″ x 36 1/2″
Star block size: 9 1/2″ (unfinished)
Fabric Requirements:
Star Background (white): 2/3 yard
Star Points (red): 1/3 yard
Star Points (blue): 1/4 yard
Star Centers (green print): 1/8 yard
Star Centers (blue print): 1/8 yard
Applique Background: 5/8 yard
Applique: Scraps of assorted greens and red
Flange (green): 1/8 yard
Binding: 1/3 yard
Backing: 1 1/4 yard
Other notions: Paper backed fusible web, Triangle in a Square ruler by Quilt in a Day
All seam allowances are 1/4″.
I’m going to start with a lesson on constructing the star blocks in the border. I know there are many methods and rulers available to make the star points for this block.
My instructions use the Triangle in a Square ruler by Quilt in a Day. I like that you start with an oversized unit and then you trim it down to perfection with the ruler. The unfinished size of your block will be 9 1/2″.
Cutting Instructions for star block:
Star Background: Cut (2) 4″ strips. Using the triangle shaped ruler, place the red placement line on the bottom edge of strip and cut 12 center triangles.
star point center cuttingALSO, cut (5) 3 1/2″ wide strips; subcut into (48) 3 1/2″ squares.
Star Points: Cut (2) 5″ strips of red fabric and (1) 5″ strip of blue fabric. Sub-cut into (32) 2 1/2″ x 5″ rectangles of red, and (16) 2 1/2″ x 5″ rectangles of blue.
Star Centers (green): Cut (1) 3 1/2″ wide strip. Subcut into (8) 3 1/2″ squares.
Star Centers (red): Cut (1) 3 1/2″ wide strip. Subcut into (4) 3 1/2″ squares.
Assembly Instructions:
1. From the red and blue 2 1/2″ x 5″ rectangles, you need to cut them diagonally in half. Make sure that you are cutting them in pairs with same sides together to get a mirror imaged pair.
star points cut rectangle
2. Place the center triangles and the side-triangles on your surface. Flip the center triangle onto the left side-triangle with right sides together. The tip of the side-triangle will extend beyond the center triangle as illustrated below:
star point left side line positionStitch and press towards the side-triangle.
3. Take the right side-triangle and place it right sides together on top of the previous unit so that the tip of the side-triangles lines up with the seam allowance tip as shown below:
star point right side stitiched and matchedStitch and press towards the side-triangle.
4. Using the square-up ruler, place the red triangle lines on the seam lines, making sure that you have 1/4″ above the top of the triangle. Trim the right side and top edge.
star point trim step 1Turn the unit and trim the remaining two sides. The unit should measure 3 1/2″:
star point trim step 2aMake 32 red/white star points and 16 blue/white star points
5. Arrange the 3 1/2″ white background squares, 3 1/2″ center squares and 3 1/2″ star points as shown.
star block pieces lay outSew into rows. Press the center row seams toward the center and top/bottom row seams towards the outside.
star point rows sewnSew the rows together, matching seams. Press towards the center. The star should measure 9 1/2″.
Christmas star finishedMake 8 red/white stars and 4 blue/white stars.
Center Applique:
1. Cut the applique background fabric to 19″ square.
2. Print the pdf file with templates for the applique circles, tree trunk, and bow. This can be found here: Christmas Tree Applique. Make sure to print this out at actual size (no scaling).
3. Use your favorite method for applique. I used machine applique (with fusible web) and a blanket stitch. You can find my tutorial for that here. The condensed steps are below:applique steps via the crafty quilterThere are a total of 15 circles for the tree. Make them as scrappy as you want. The bottom row of circles should be about 3″ from the bottom edge of background fabric. There is 1/2″ between each circle.
applique before stitchingAfter stitching the applique pieces down, trim the square to 18 1/2″.
4. If desired, add a flange to the center applique. I used 1″ wide strips for mine. You can see my previous tutorial on how to add a flange here.
applique with flange fullAssemble the quilt:
1. Sew 4 star blocks together for the top and bottom rows, making sure there is a blue star at each end.
2. Stitch two stars together for each side.
Make sure to match the seam well at the star points!
3. Stitch the two side star borders to center applique.
Stitch the top and bottom star borders on.
Now you get to baste, quilt and bind! Remember to add a hanging sleeve if you want. Mine is made with polka dots!
Enjoy your Christmas Tree Wall Hanging!
Leave a Reply