
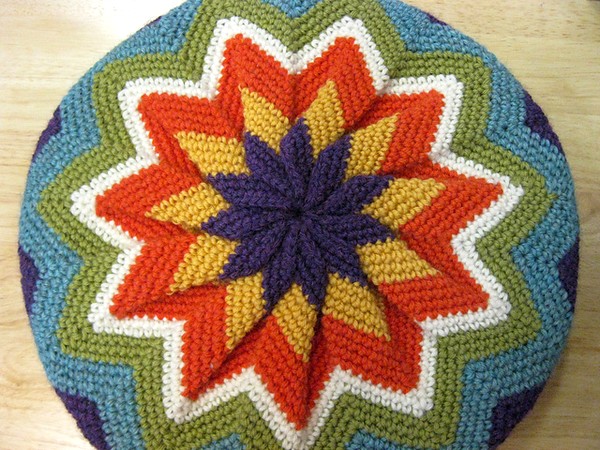
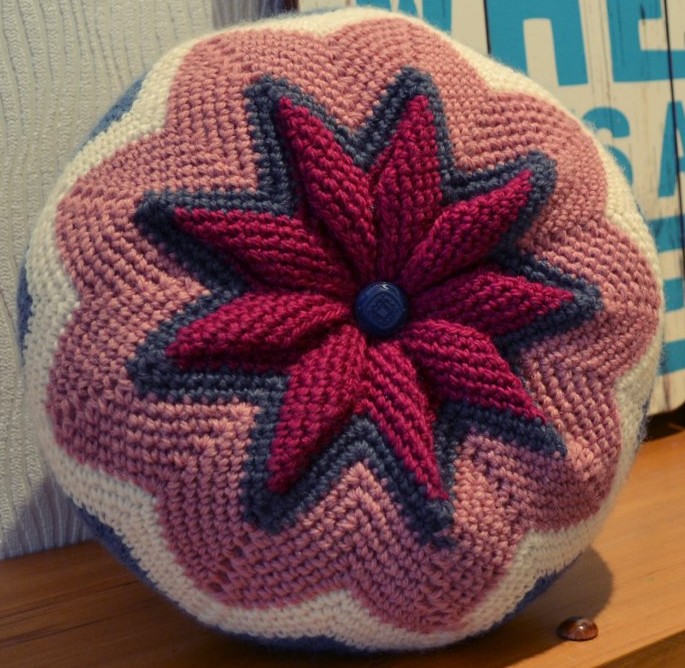
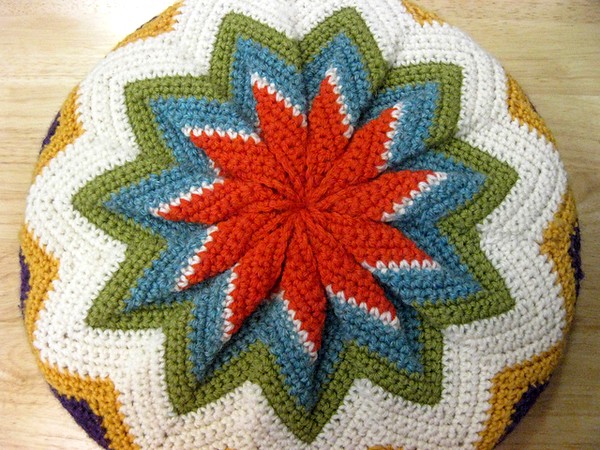
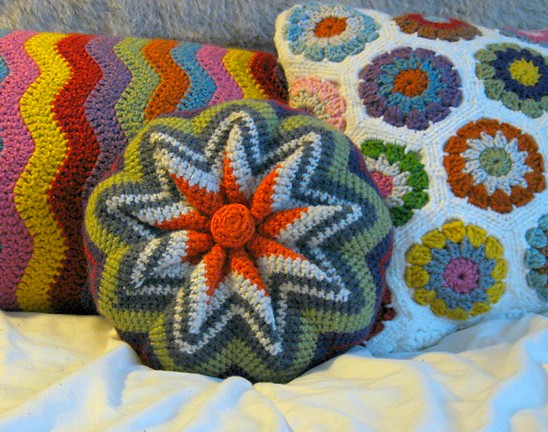
Crochet Pillow - "zig-zag pillow"
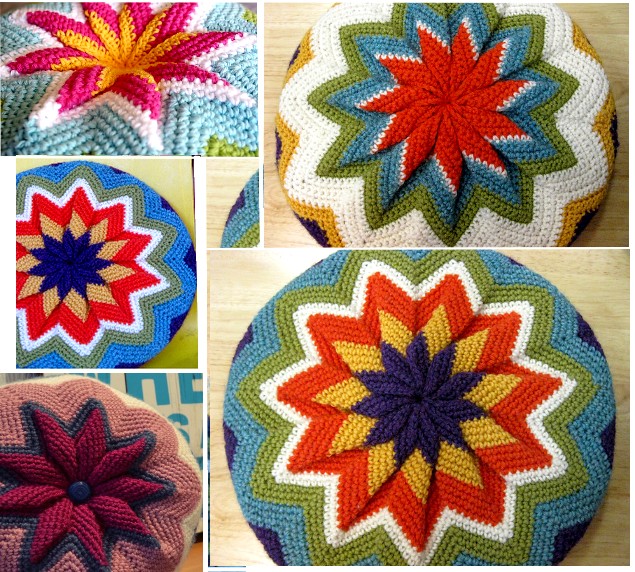
The ‘pinwheel’, or ‘zig-zag pillow’ is a classic crochet project. This new pattern is modernized with simplified shaping. It is also streamlined by omitting one feature; these cushions, in decades passed, were usually worked with a hard circular centre covering the join, much like the centre of a flower. With this new pattern it is no longer necessary to cover the centre join. This gives the cushion a modern look. It's comfier too. Instructions for a centre are included.

There are also optional finishing instructions for 'couching' the pillow.
by Morgan Forrester
Skill level: Advanced Beginner
Techniques Used: Crocheting in the Round, Simple Increases,
Changing Colours
Materials:
250g Worsted Weight Yarn, at least 2 colours. Six colours were used in the original.
4mm Crochet Hook, or size required for gauge.
Large eye Darning Needle or Crochet Hook (3.5-5mm) for Finishing
Large eye Needle with a fairly sharp point for cushioning.
1 Foam Cushion Form. These are available in most craft departments and in better fabric stores. If you cannot find a circular form, consider rounding off a square form with sharp sissors, or liberating a form from an existing cushion.
This pattern should fit cushion forms from 10-15 inches. 12” forms are easily obtainable.
Abbreviations used:
ch -Chain Stitch
sc -Single Crochet
sk -Skip
sl st -Skip Stitch
Instructions:
Start with a generous tail. There should be several inches of yarn before the slip knot or first chain stitch is worked.
Ch 154
Join to first chain stitch with a slip stitch, forming ring.
Pause to make sure that there are no twists in the ring.
Ch 1
Begin Zig Zag Stitch Pattern:
1 sc in each of the next 7 stitches
3 sc in next stitch
1 sc in each of the next 7 stitches
Skip next 2 stitches
Follow Zig Zag pattern for the entire row. Continue in rounds. Do not chain one at the end of each row; continue in pattern (skip 2, 1 sc in each of the next 7 stitches)
Continue until first colour change.
Changing Colours:
Work to the next to last stitch in row.
Work the last single crochet in row as follows:
With the working yarn, insert hook into next single crochet and pull through loop (2 loops on hook).
Leaving a 2" tail, drape the next colour over the hook and pull through 2 loops to finish the single crochet.
Skip next 2 stitches.
Work next single crochet with the new colour and pulling taut, work over and around the old colour, locking it's tail in place.
Do not cut the old colour until you have worked 2-3 sitiches in this manner, and leave a tail for additional weaving in when you do.
Continue stitch pattern with the new colour.
Colour Sequence:
Orange (4 Rows)
White (1)
Blue (3)
Green (3)
White (4)
Yellow (2)
Purple (4)
Blue (4)
Green (3)
White (2)
Orange (4)
Yellow (4)
Purple (3)
This is the Colour Sequence I used for my pillow. If you would like to use your own sequence, I suggest trying The Random Stripe Generator. Of course, you could just dive in, changing colours when you feel inspired to do so. Don't forget that you can change the number of colours used to amazing effect, and that this project is a great stash buster; just change yarns when you run out of each colour.
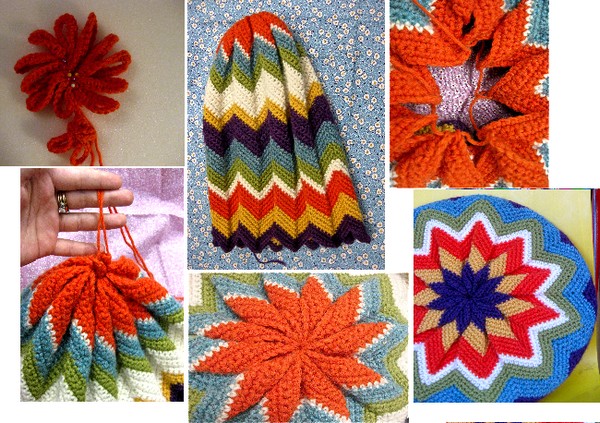
Finishing:
You may choose to finish the first end of the pillow before you have finished stitching. This will help you judge the length still required.
With the starting tail thread through each point, using the middle stitch of the sc3 increase.
(If you did not leave several inches of yarn at the beginning of the project, you can use waste yarn of the same colour for this step). Pull taut.
The points should come together like a draw string bag. The fabric should fold into a pinwheel by itself. If it does not, blocking may help the effect. You could also tack the points into place using small stitches. At this point you can slip the crochet over the cushion form. It should be a snug fit. If the points of the open end lay flat in the centre, you are done crocheting. If not, keep stitching in pattern.
When the crochet covers the the cushion completely finish the open end as for the opposite end. Use the working yarn to draw up the points; just clip the yarn leaving a long tail.
You may choose to thread the tails through the centre stitches several times to provide a strong connection.
Optional Finishing:
There are two ways to create a centre for your pinwheel. The first is cleaner. Work a crocheted circle of 2 3 rows.
Ch 4
In 2nd stitch work 7 sc, sl st to 1st sc to join into a circle.
2sc in each st around.
2sc in next stitch, 1sc in next stitch *2sc, 1sc* in each stitch around
Sl st to join, cut yarn and weave in end.
Make Two.
Thread yarn with sharp Big Eyed Needle
Tack centre of each circle to centres of pinwheels.
To cushion, push needle through stitching and cushion form, passing back and forth from back to front of the pillow. Take several stitches, making sure that the circle centre does not flip up around the stitches.
Don't focus your sewing on the very centre; work some stitches around the edge for a smooth finish.
Sometimes the centre of these pillows is worked with a form. This form can be made of cardboard or a circle cut from firm plastic. Make two. If you are using plastic you may need to sand the edges. Crochet a large circle, or even a simple single crochet rectangle, leaving a long tail. Place the form in the centre of the crochet. The crochet should fold up and over the form, meeting in the middle. Using the needle weave the long tail in and out around the edge of the crochet and pull taut around the form.
The tail/working yarn should be in the centre of the circle. Using the needle push through the centre of the cushion and pass through a similar circle on the opposite side. Pull tight to get a cushioned or tufted effect. To keep things taut it is a good idea to use knots to finish.
For more information: www.theloophalifax.ca
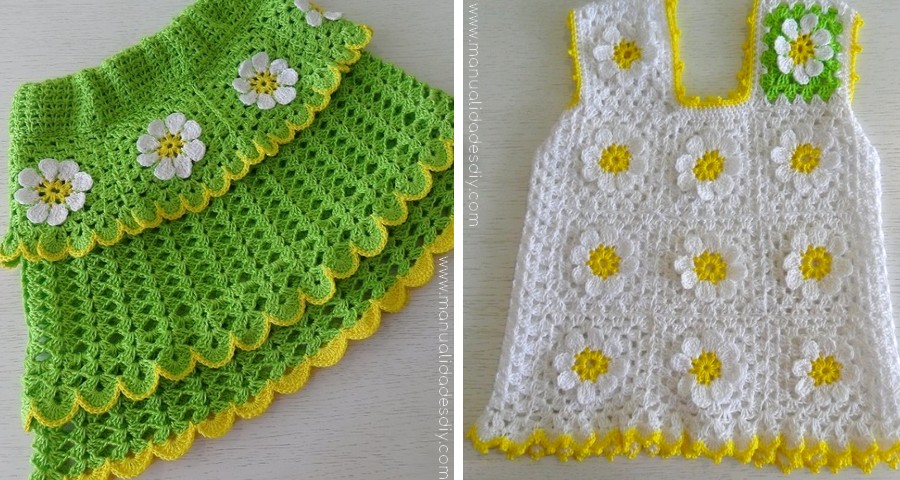
Crochet skirt and blouse set for girl
Creating a crochet coat whit a beautiful crochet pattern
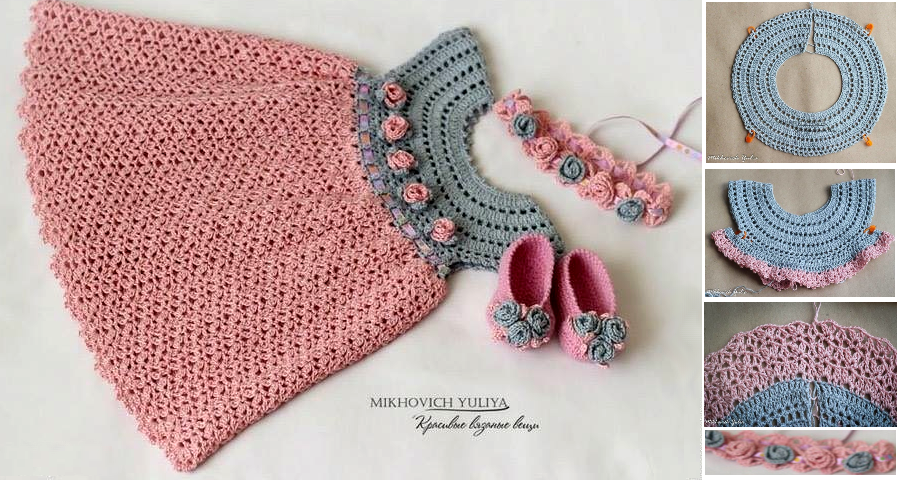
Gorgeous Crochet Girl Dress - Step by Step
Leave a Reply
Related posts