
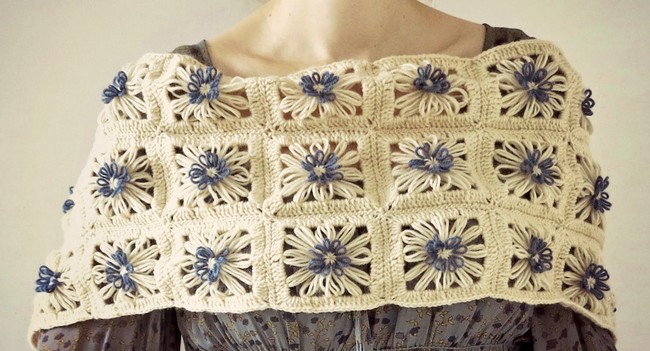
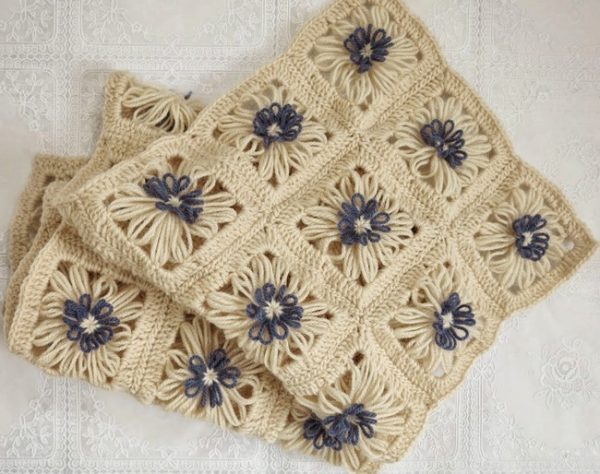
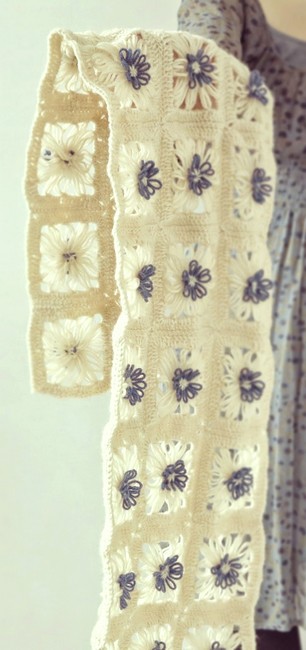
DAISIES SCARF WITH PATTERN
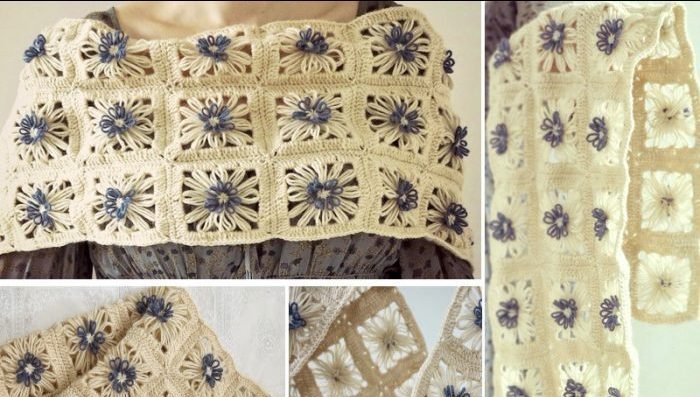
This is a beautifull scarf that can be use on many ocasions. It's a diferent scarf that can be made to warm your day.
If you'd like to give it a try, here's what you'll need:
- flower loom with two diametres: of 9 cm and 5 cm / appr. 3.3 inch and 1.3 inch).
- 3 mm crochet hook
- fingering weight yarn,
- blunt needle.
Making the flowers
Of course you can make as many as you would like for your scarf. This have 45 flowers (three rows of 15 flowers)
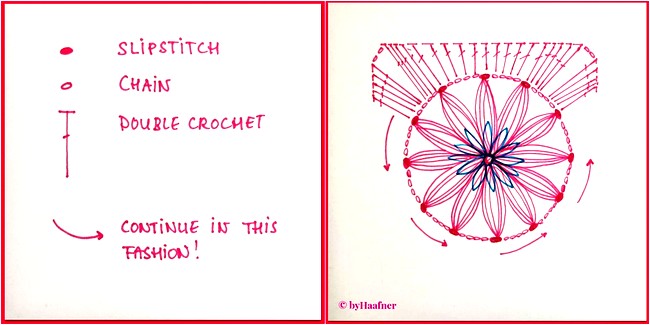
- Make your first flower by wrapping the white (or any colour) yarn three times around twelve pins of the biggest loom. Cut the yarn, leave the flower on the loom.
- Make a smaller flower on top of the first one with the blue (or any colour) yarn, using the smallest loom. Wrap this yarn only once round every pin. Cut the yarn.
- Now use the blunt needle and the white yarn (about 15 cm / 5.3 inch) to secure the petals. Put the needle through the centre of the flower (from the back to the front) and then down between two petals, put it up again through the centre and put down between two other petals, continue like this until you've secured every petal. This will create a little white star in the middle of your flower. If you like, you can repeat this process to have a more prominent star shape in the middle.
- Leave the flower on the loom. Secure the ends of the blue and white yarn by pulling them through the centre of your flower to the backside with the needle.
- Now gently pull the flower off the loom.
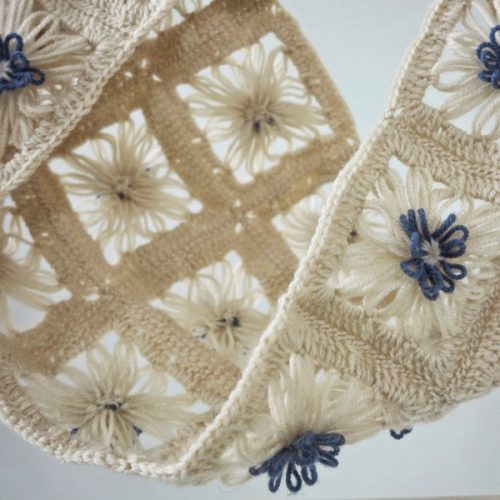
- This is this the best moment to crochet the square around the flower (rather then waiting till you've made all the flowers), because the petals will still be in shape and not tangled.
Creating a square
- Attach white yarn to any big (white) petal by making a slip stitch. (Remember, you've wrapped the white yarn thrice around every pin, which means that one big petal consists of three loops.)
- chain 4, slip stitch in the next petal, chain 4, sl st in the next petal. Continue around, then slip stitch in the first slip stitch.
- slip stitch in the ch4-space,
- make a standing dc or ch2 (this will count a as your first dc), 3dc in the same space, 1 dc in the sl st of the previous round, 4dc in next ch4-space, 1dc in sl st, 4dc in next ch4-space, ch2, 4dc in the same space (you've now made your first corner).
- continue like this until you've completed your square.
- close the round by a sl st in the first dc of the round of by using your darning needle for a seamless join.
Finish
- Weave in all ends.
- Block the squares.
Joining the squares
You use your preferred way of joining. Sewed the squared together by whipstitching through the front and back loops of the squares (front sides held together). But any joining method will do just fine!
Source: byhaafner.blogspot.com
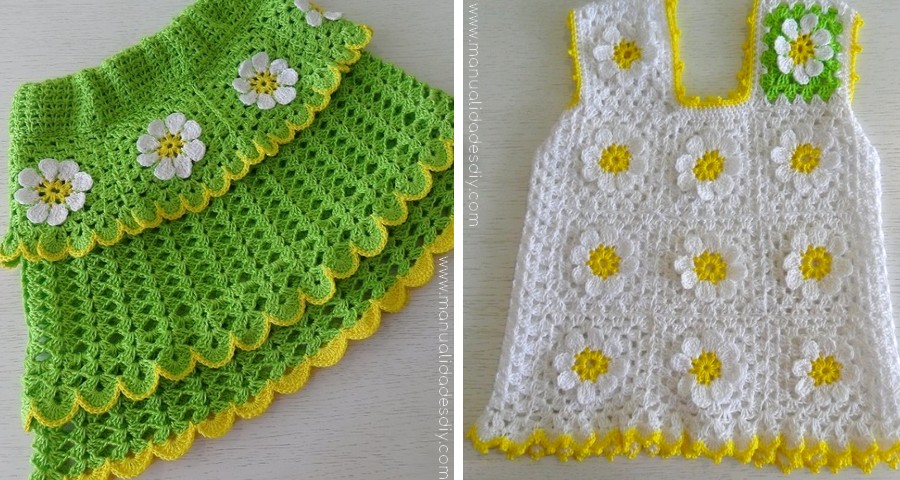
Crochet skirt and blouse set for girl
Creating a crochet coat whit a beautiful crochet pattern
Gorgeous Crochet Girl Dress - Step by Step
Leave a Reply
Related posts